Updated Image

Major VersionM

by Jason Leonard

Introduction

No hot water is often caused by a problem with the home’s electrical wiring or circuit breakers. It can also be caused by a burned-out upper heating element.

The information on this web site is supplemental to the printed instructions that came with your water heater. To reduce the risk of property damage, serious injury or death, read and follow all labels on the water heater and the safety instructions in the printed owner's manual.

  1. Common electrical and plumbing tools To check for power or to check for a burned out heating element, you'll need a multimeter.
    • Common electrical and plumbing tools

    • To check for power or to check for a burned out heating element, you'll need a multimeter.

    • A non-contact circuit tester or volt meter.

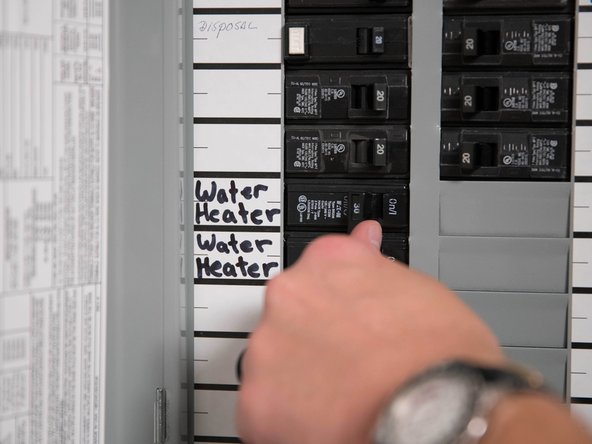
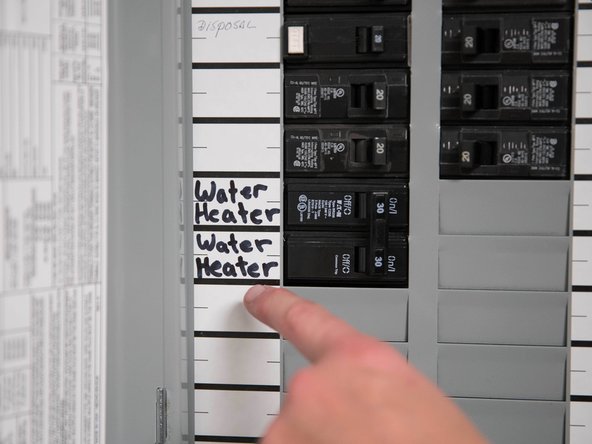
  2. Turn the power to the water heater OFF at the circuit breaker (or remove fuses). WARNING! Working near an energized circuit can result in severe injury or death from electrical shock. Check wires with a volt meter or circuit tester to make sure power is off .
    • Turn the power to the water heater OFF at the circuit breaker (or remove fuses).

    • WARNING! Working near an energized circuit can result in severe injury or death from electrical shock. Check wires with a volt meter or circuit tester to make sure power is off .

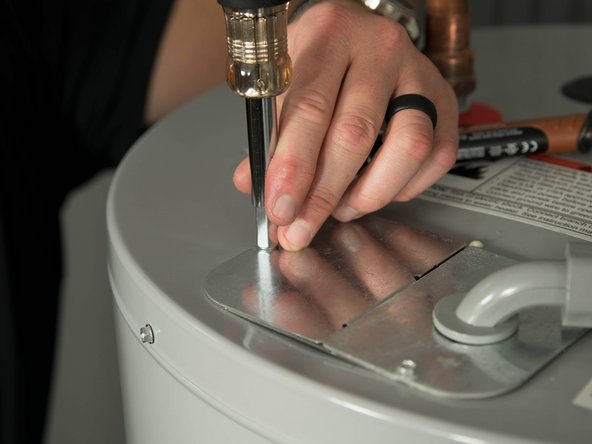
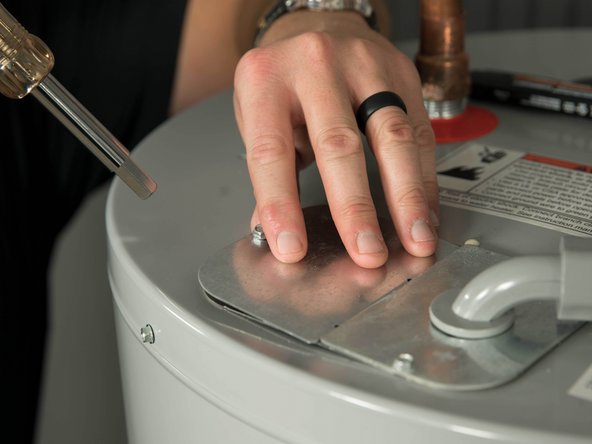
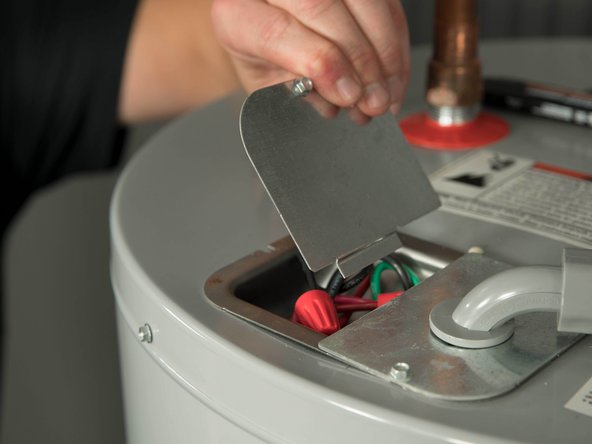
  3. Open the electrical junction box on top of the water heater. Open the electrical junction box on top of the water heater. Open the electrical junction box on top of the water heater.
    • Open the electrical junction box on top of the water heater.

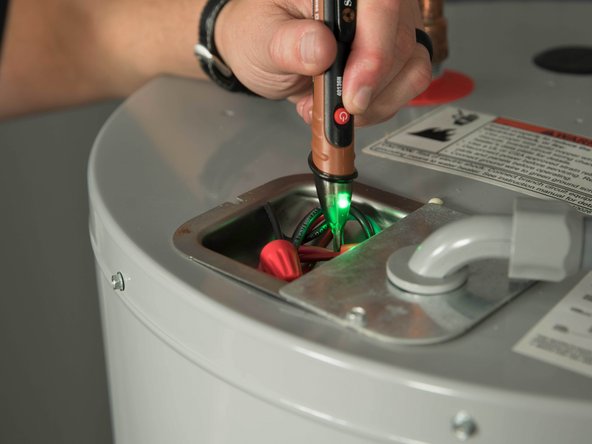
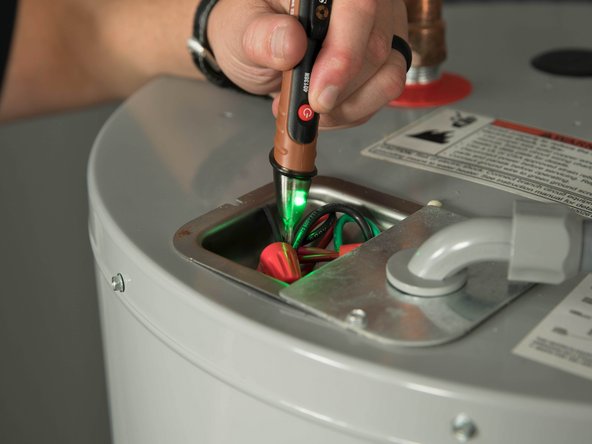
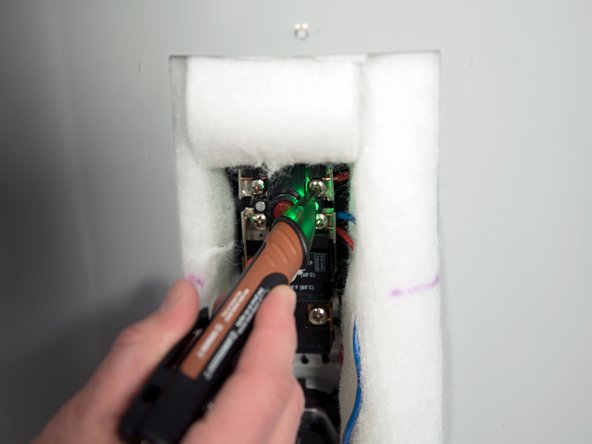
  4. Using a non-contact circuit tester, check the power wires to make certain the power is off. WARNING! Working on an energized circuit can result in severe injury or death from electrical shock. Check wires with a volt meter or circuit tester to make sure power is off.
    • Using a non-contact circuit tester, check the power wires to make certain the power is off.

    • WARNING! Working on an energized circuit can result in severe injury or death from electrical shock. Check wires with a volt meter or circuit tester to make sure power is off.

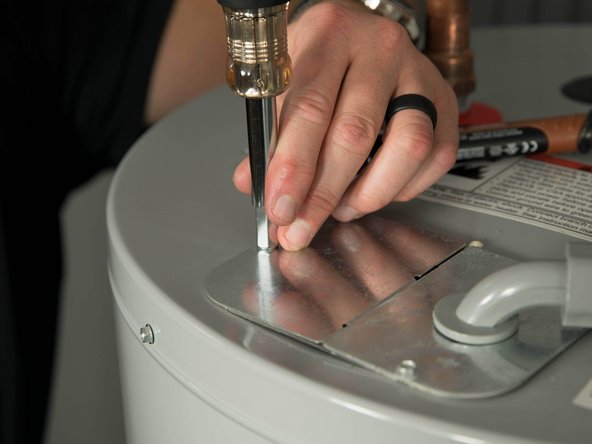
  5. Replace the junction box cover. WARNING! Be sure all covers are secured to reduce the risk of fire and electric shock.
    • Replace the junction box cover.

    • WARNING! Be sure all covers are secured to reduce the risk of fire and electric shock.

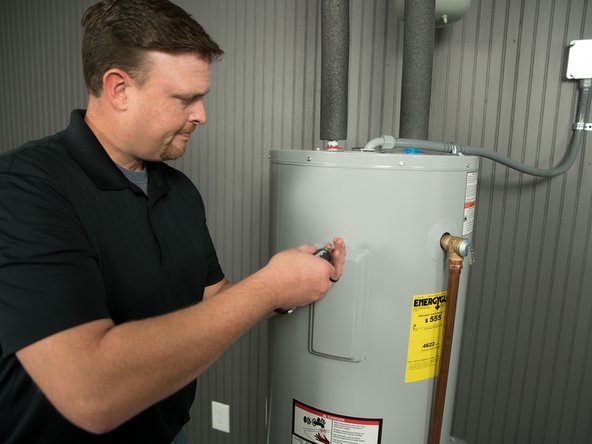
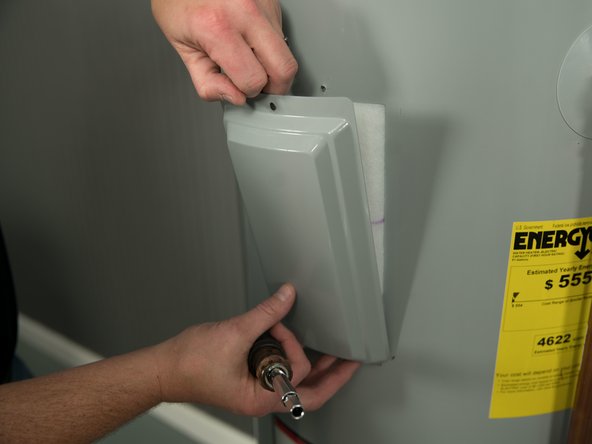
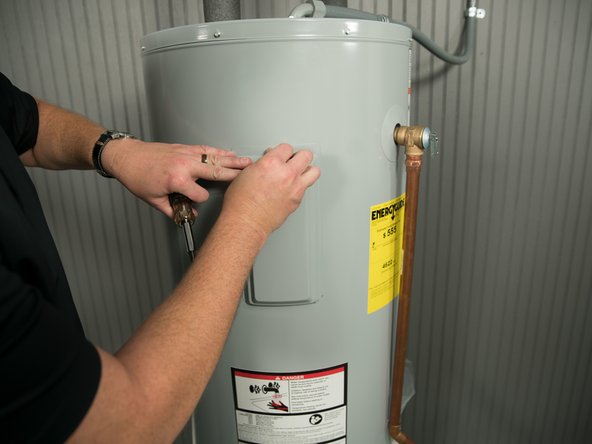
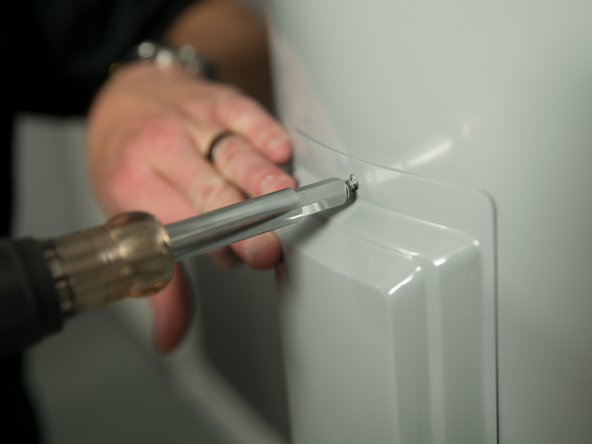
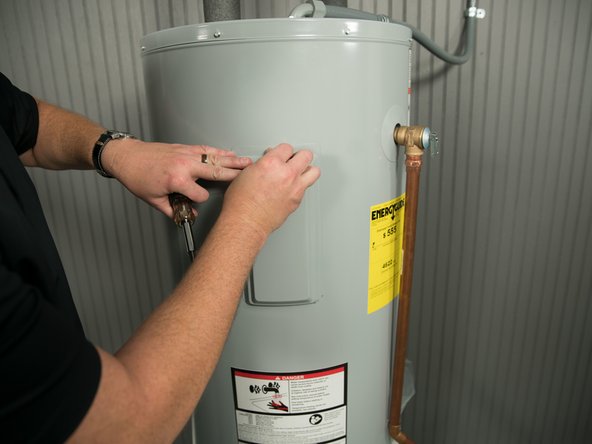
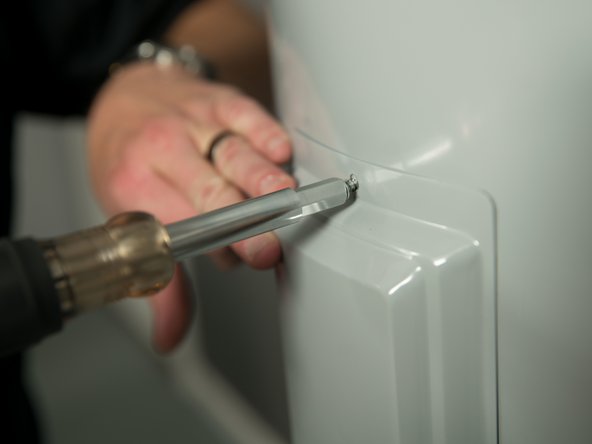
  6. Remove the Upper Heating Element Cover Remove the Upper Heating Element Cover Remove the Upper Heating Element Cover
    • Remove the Upper Heating Element Cover

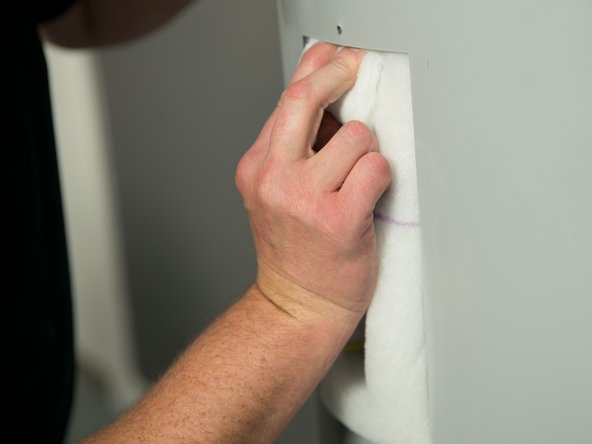
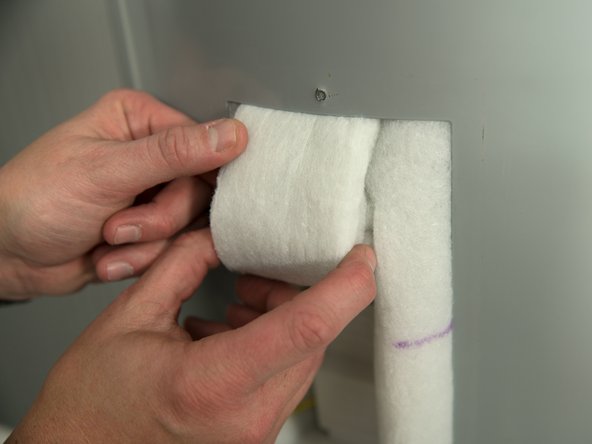
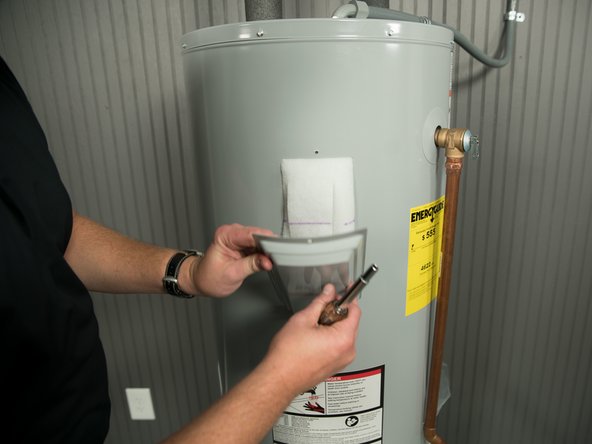
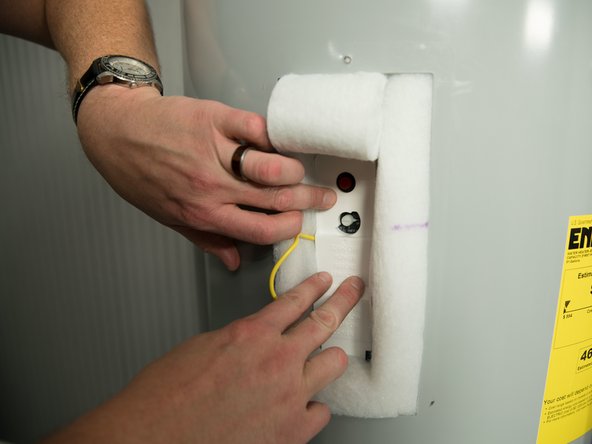
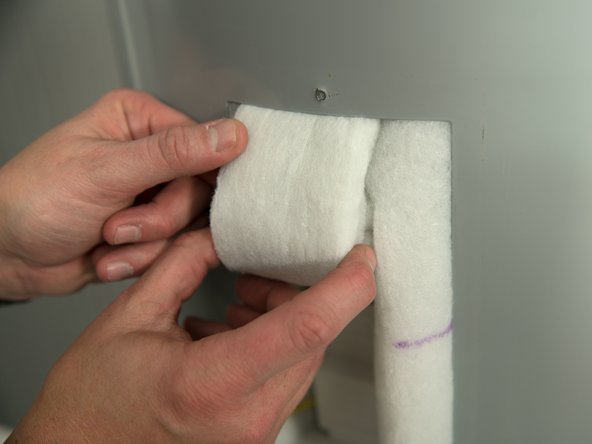
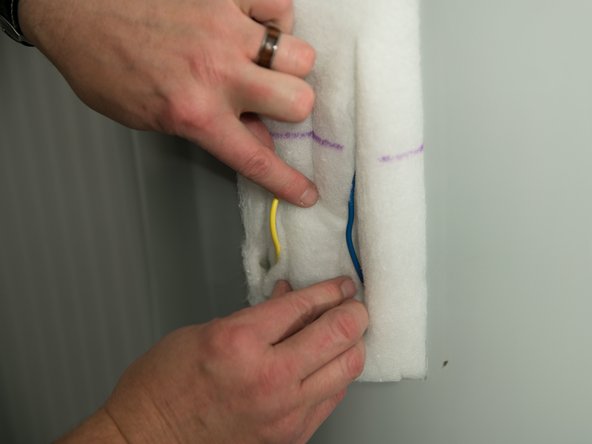
  7. Carefully fold back the insulation (tuck the insulation under the water heater's jacket). Carefully fold back the insulation (tuck the insulation under the water heater's jacket). Carefully fold back the insulation (tuck the insulation under the water heater's jacket).
    • Carefully fold back the insulation (tuck the insulation under the water heater's jacket).

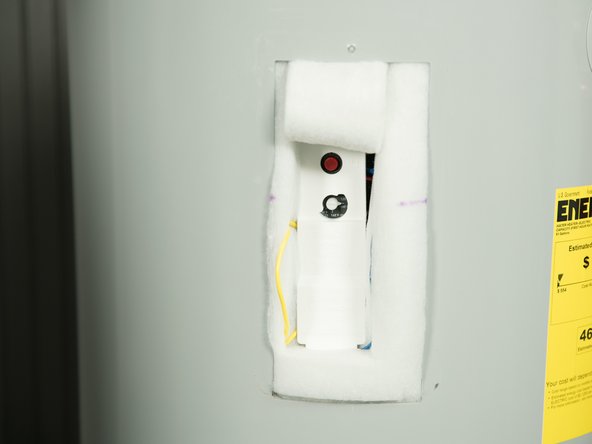
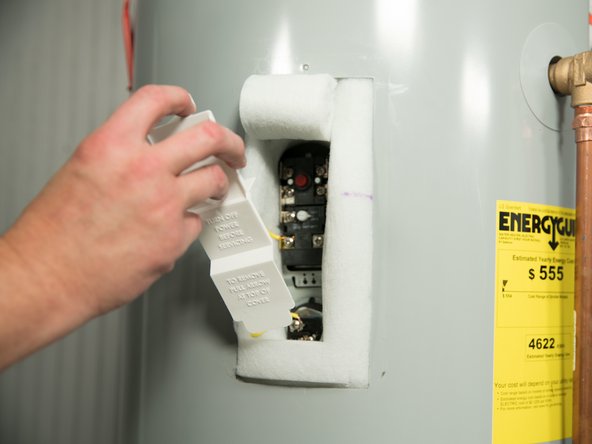
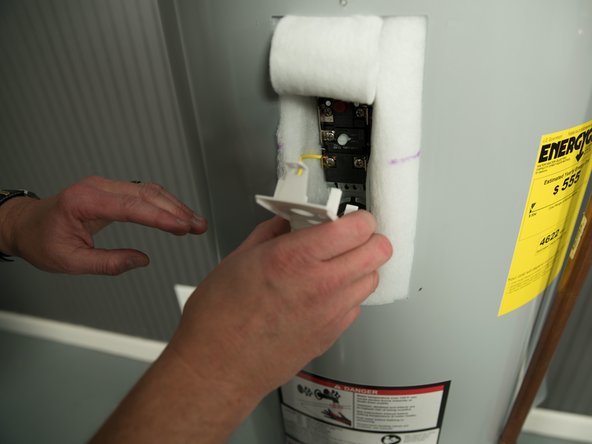
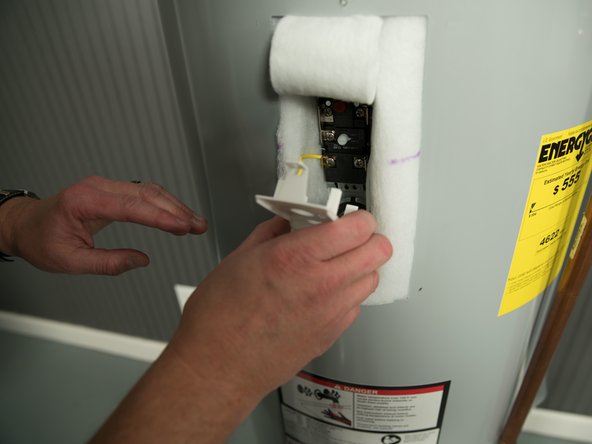
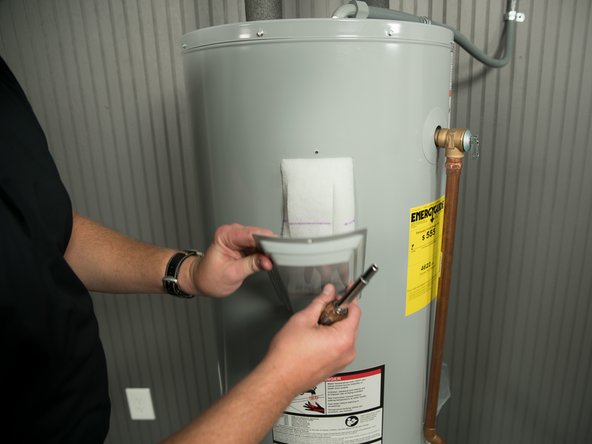
  8. Remove the plastic protector. Remove the plastic protector. Remove the plastic protector.
    • Remove the plastic protector.

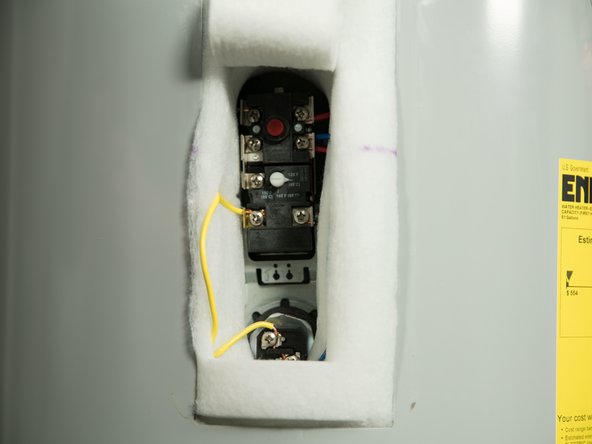
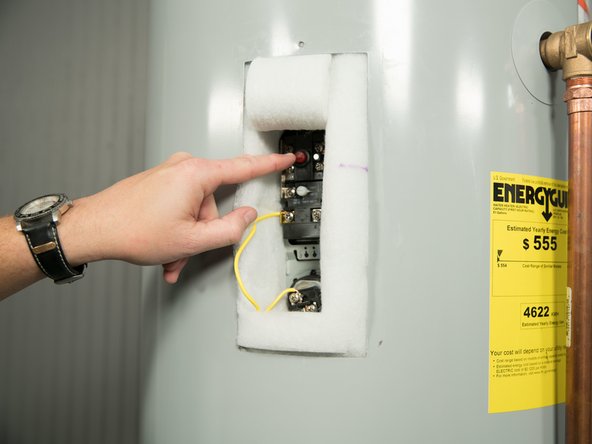
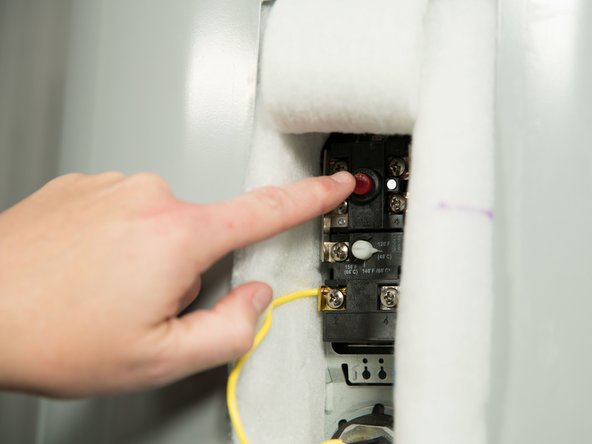
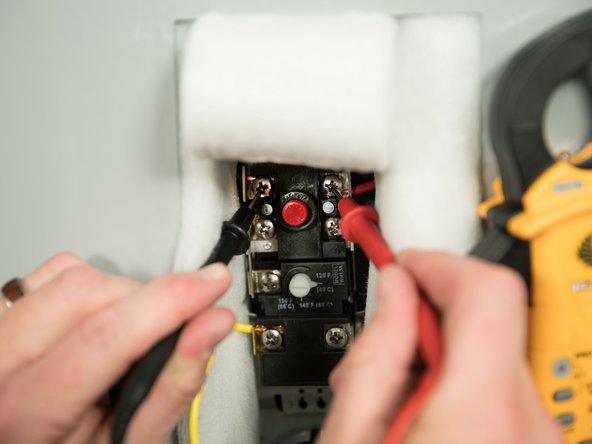
  9. The Energy Cutoff (ECO) shuts off power to the water heater’s elements if the temperature of the water in the tank gets too hot. If the ECO has tripped, you’ll have no hot water. To check the ECO, press the red ECO reset button. If the ECO was tripped you'll hear a click. A tripped ECO indicates a problem with one of the heating elements or thermostats. See Energy Cutoff (ECO) Tripped.
    • The Energy Cutoff (ECO) shuts off power to the water heater’s elements if the temperature of the water in the tank gets too hot. If the ECO has tripped, you’ll have no hot water.

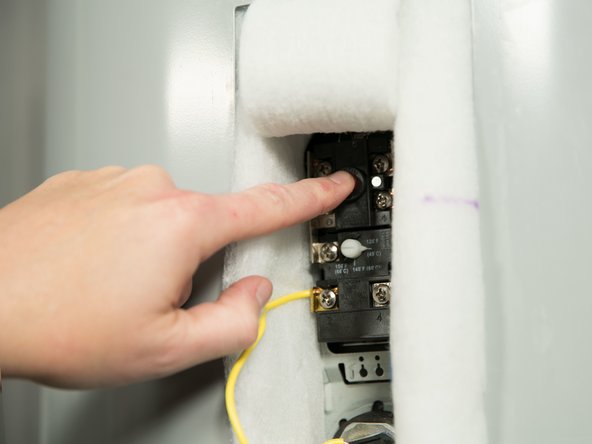
    • To check the ECO, press the red ECO reset button.

    • If the ECO was tripped you'll hear a click. A tripped ECO indicates a problem with one of the heating elements or thermostats. See Energy Cutoff (ECO) Tripped.

    • If you don't hear a click, the ECO was not tripped.

    • Do not turn the power back on until the cause of the overheating has been identified and repaired.

  10. Turn the power back ON. WARNING! Working near an energized circuit can result in severe injury or death from electrical shock.
    • Turn the power back ON.

    • WARNING! Working near an energized circuit can result in severe injury or death from electrical shock.

  11. Set your multi-meter to read AC volts. See the water heater's data plate for the correct voltage. See the water heater's data plate for the correct voltage.
    • Set your multi-meter to read AC volts.

    • See the water heater's data plate for the correct voltage.

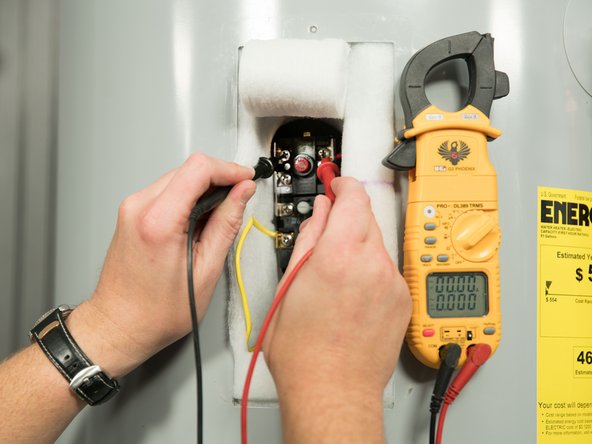
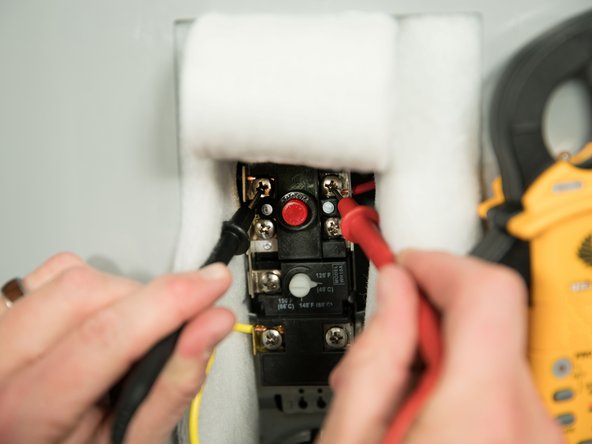
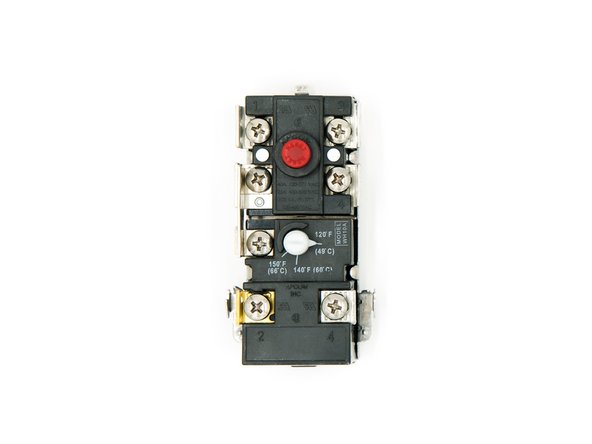
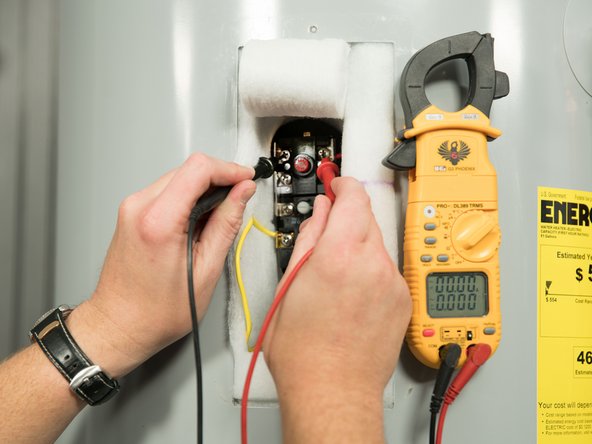
  12. Read the voltage on the top two screws of the upper thermostat. If the voltage supplied to the water heater matches the requirements on the data plate, skip to step 16.
    • Read the voltage on the top two screws of the upper thermostat.

    • If the voltage supplied to the water heater matches the requirements on the data plate, skip to step 16.

    • If the voltage supplied to the water heater does not match the requirements on the data plate, contact an electrician or other qualified person.

  13. Replace the plastic protector. Replace the plastic protector.
    • Replace the plastic protector.

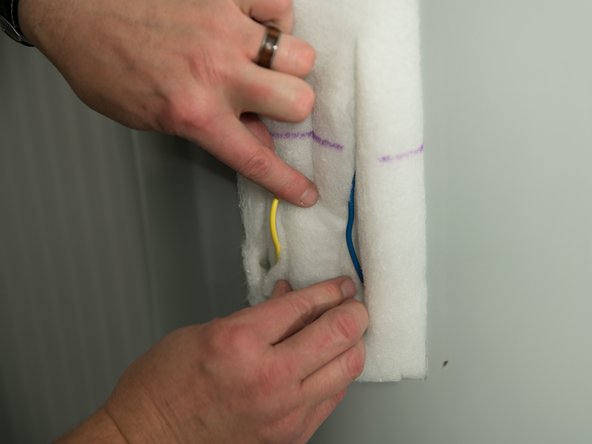
  14. Replace the insulation. Replace the insulation.
    • Replace the insulation.

  15. Replace the heating element cover. WARNING! Be sure all covers are secured to reduce the risk of fire and electric shock. WARNING! Be sure all covers are secured to reduce the risk of fire and electric shock.
    • Replace the heating element cover.

    • WARNING! Be sure all covers are secured to reduce the risk of fire and electric shock.

  16. If the water heater is getting the correct voltage, check to see if the upper heating element has burned out. Turn the power to the water heater OFF at the circuit breaker (or remove fuses).
    • If the water heater is getting the correct voltage, check to see if the upper heating element has burned out.

    • Turn the power to the water heater OFF at the circuit breaker (or remove fuses).

  17. WARNING! Working on an energized circuit can result in severe injury or death from electrical shock. Check wires with a volt meter or circuit tester to make sure power is off. WARNING! Working on an energized circuit can result in severe injury or death from electrical shock. Check wires with a volt meter or circuit tester to make sure power is off.
    • WARNING! Working on an energized circuit can result in severe injury or death from electrical shock. Check wires with a volt meter or circuit tester to make sure power is off.

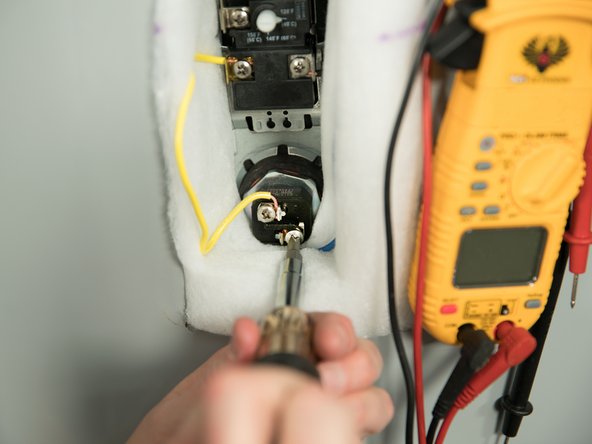
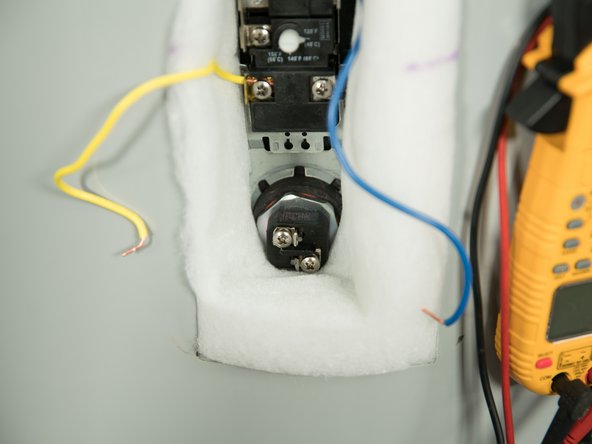
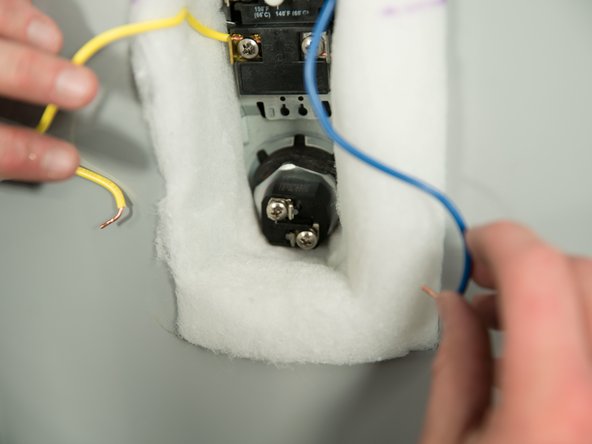
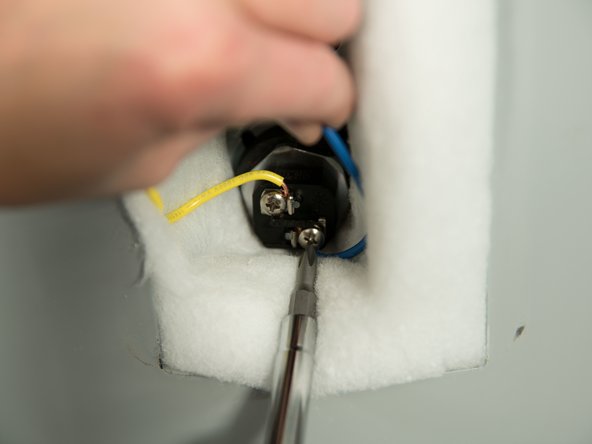
  18. Remove the two power wires from the upper heating element. Remove the two power wires from the upper heating element. Remove the two power wires from the upper heating element.
    • Remove the two power wires from the upper heating element.

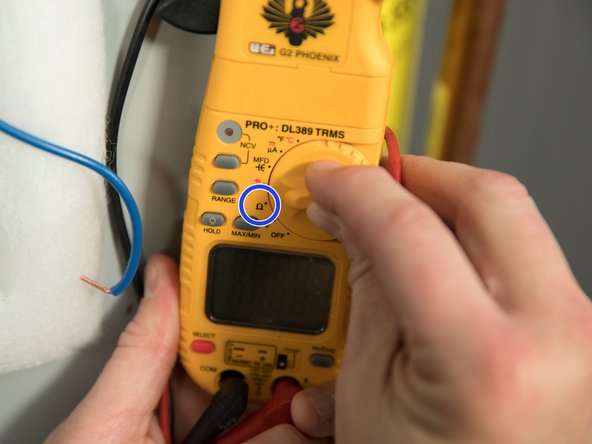
  19. Set the multimeter to read resistance (200 Ohm range or lower, depending on the type of meter you have). Set the multimeter to read resistance (200 Ohm range or lower, depending on the type of meter you have).
    • Set the multimeter to read resistance (200 Ohm range or lower, depending on the type of meter you have).

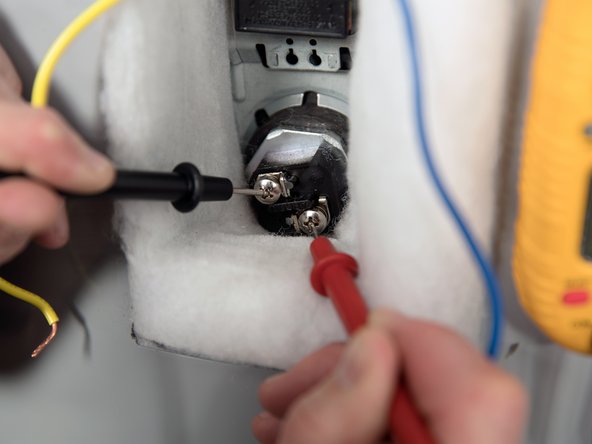
  20. Check the resistance of the upper heating element using a multimeter. Measure the resistance between the two screw terminals on the upper heating element. A good element will have a resistance  between 5 and 25 Ohms. If the reading is outside that range See Checking/Replacing Heating Elements.
    • Check the resistance of the upper heating element using a multimeter. Measure the resistance between the two screw terminals on the upper heating element.

    • A good element will have a resistance between 5 and 25 Ohms. If the reading is outside that range See Checking/Replacing Heating Elements.

    • On a new water heater, a burned out upper heating element is almost always caused by turning the power on before the tank was completely full of water (dry fire).

  21. If upper element is good, replace the upper thermostat. see Replacing a Thermostat
    • If upper element is good, replace the upper thermostat. see Replacing a Thermostat

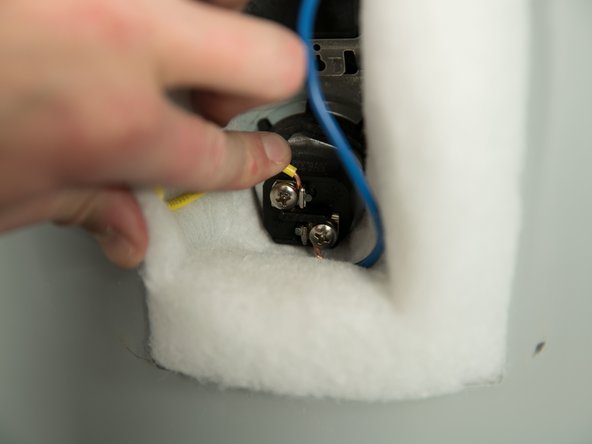
  22. Attach the wires to the element. Attach the wires to the element. Attach the wires to the element.
    • Attach the wires to the element.

  23. Replace the plastic protector. Replace the plastic protector.
    • Replace the plastic protector.

  24. Replace the insulation. Replace the insulation.
    • Replace the insulation.

  25. Replace the heating element cover. WARNING! Be sure all covers are secured to reduce the risk of fire and electric shock. WARNING! Be sure all covers are secured to reduce the risk of fire and electric shock.
    • Replace the heating element cover.

    • WARNING! Be sure all covers are secured to reduce the risk of fire and electric shock.

  26. If both elements and thermostats are good, check for a leak on the hot water side of the homes plumbing system. Even a small leak can make it seem like the water heater is not making hot water.
    • If both elements and thermostats are good, check for a leak on the hot water side of the homes plumbing system. Even a small leak can make it seem like the water heater is not making hot water.

  27. Turn the power back ON (or replace fuses).
    • Turn the power back ON (or replace fuses).

  28. WARNING! Working near an energized circuit can result in severe injury or death from electrical shock. Check wires with a volt meter or circuit tester to make sure power is off . WARNING! Working near an energized circuit can result in severe injury or death from electrical shock. Check wires with a volt meter or circuit tester to make sure power is off .
    • WARNING! Working near an energized circuit can result in severe injury or death from electrical shock. Check wires with a volt meter or circuit tester to make sure power is off .

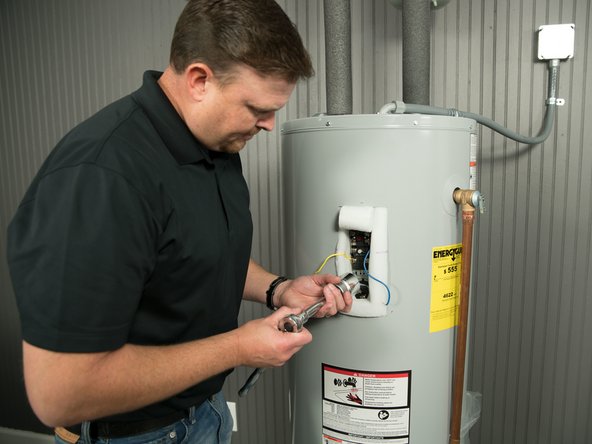
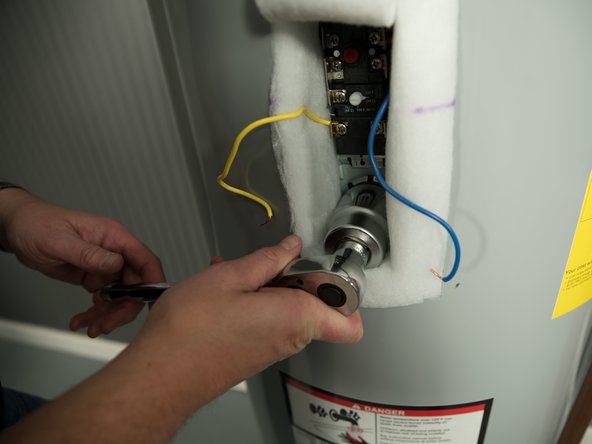
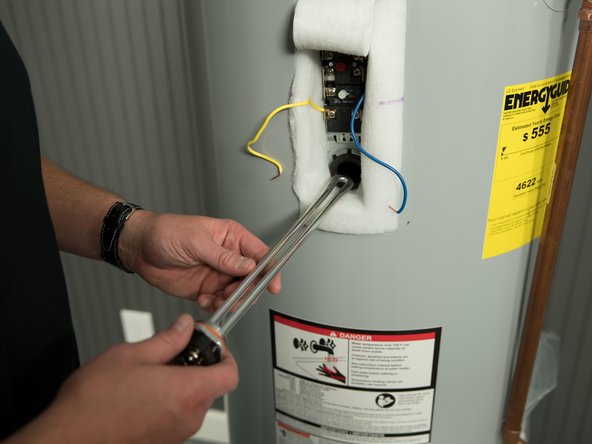
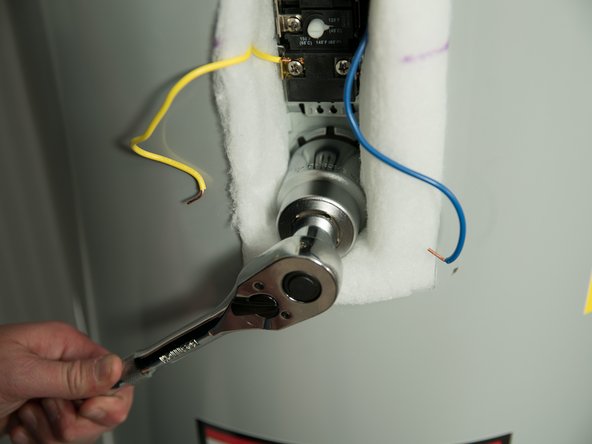
  29. Unscrew the old element with an element wrench. Unscrew the old element with an element wrench.
    • Unscrew the old element with an element wrench.

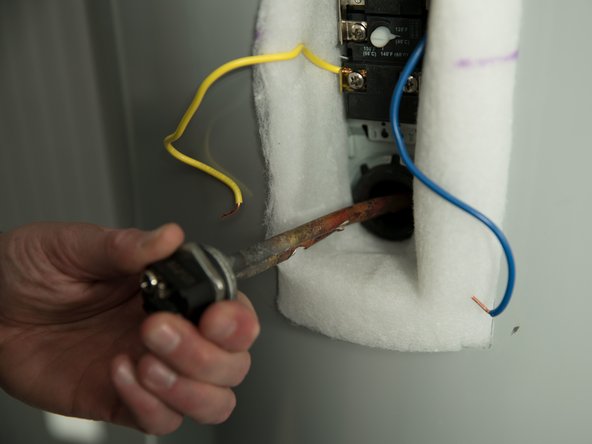
  30. Remove the old element.
    • Remove the old element.

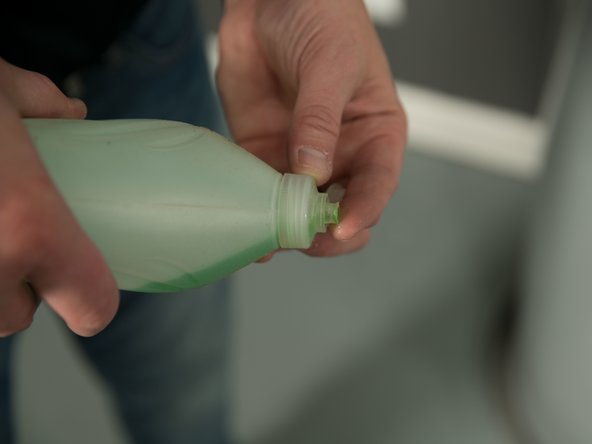
  31. Lubricate the gasket of the new element with dish soap. Lubricate the gasket of the new element with dish soap. Lubricate the gasket of the new element with dish soap.
    • Lubricate the gasket of the new element with dish soap.

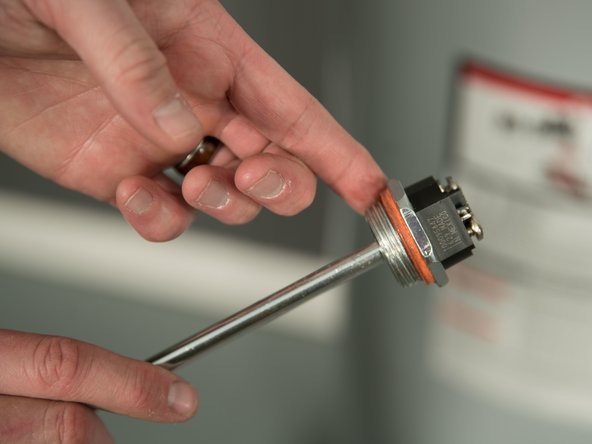
  32. Install the element and hand tighten. Tighten with an element wrench or 1 1/2" deep well socket.
    • Install the element and hand tighten.

    • Tighten with an element wrench or 1 1/2" deep well socket.

Finish Line

One other person completed this guide.

Jason Leonard

Member since: 05/05/2016

50 Guides authored

Team

Content CreationTeam Member of Content CreationTeam

8 Members

69 Guides authored

0 Comments

Add Comment

View Statistics:

Past 24 Hours: 1

Past 7 Days: 1

Past 30 Days: 3

All Time: 276